
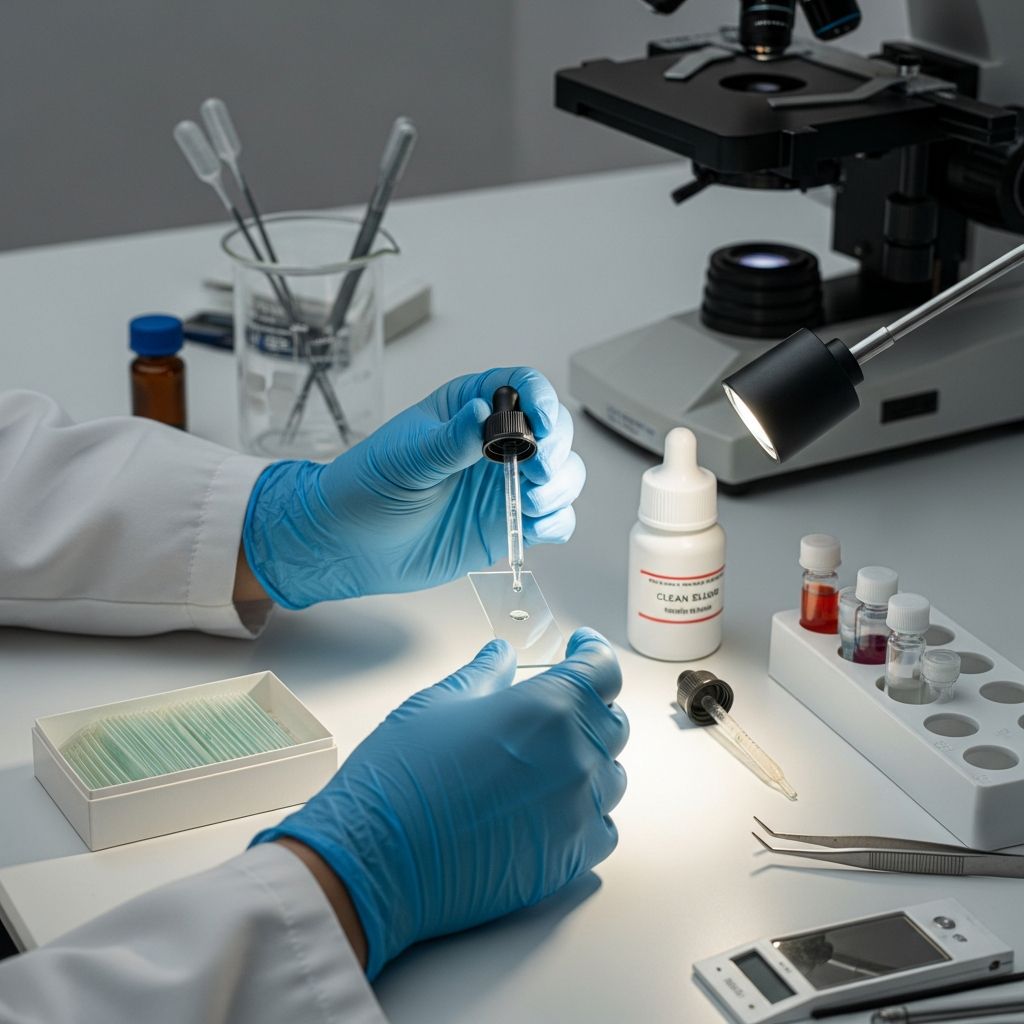
Fundamental Principles of Microscope Slide Preparation
Proper preparation of microscope slides represents one of the most critical skills in microscopy and laboratory science. The quality of your slide preparation directly determines the clarity, accuracy, and reliability of your observations under the microscope. Whether you are a student conducting educational experiments, a researcher examining biological specimens, or an enthusiast exploring the microscopic world, understanding the fundamentals of slide preparation is essential for success.
Microscope slides are thin, flat pieces of glass or plastic material, typically measuring approximately one inch by three inches with a thickness between one to 1.2 millimeters. These standardized dimensions allow slides to fit securely into the stage of most compound and biological microscopes. The transparent nature of the glass or plastic material permits light to pass through the specimen, enabling magnification and detailed observation.
The preparation process involves several interconnected steps that must be executed with precision and care. Each decision you make during preparation—from the materials you select to the mounting technique you employ—influences the final image quality and the longevity of your slide.
Essential Materials and Equipment Requirements
Before beginning any slide preparation, gathering all necessary materials and equipment ensures a smooth, organized workflow. Having everything prepared in advance prevents contamination and reduces the risk of damaging delicate specimens.
The foundational materials required include:
- Clean microscope slides (flat or concave, depending on your specimen type)
- Cover slips of appropriate size and thickness
- Distilled water or appropriate mounting medium
- Sterile pipettes or droppers for liquid transfer
- Forceps or tweezers for specimen manipulation
- Sterile inoculation loops for bacterial cultures
- Staining solutions (iodine, methylene blue, or other appropriate stains)
- Paper towels or absorbent wipes
- Personal protective equipment including gloves and safety glasses
- Mounting needles for controlled cover slip placement
Cleanliness represents a paramount concern throughout the entire preparation process. All slides, cover slips, and equipment must be thoroughly cleaned, dried, and free from dust, oil, and other contaminants before use. Even microscopic particles can obscure specimen details or create artifacts that complicate observation and analysis.
Wet Mount Technique: The Foundation of Specimen Mounting
The wet mount method stands as the most versatile and commonly used technique for preparing microscope slides. This approach involves suspending or immersing the specimen in a liquid medium, which serves multiple functions including preventing specimen dehydration, improving optical clarity, and facilitating specimen movement and orientation.
To prepare a wet mount slide, begin by placing your clean glass slide on a flat, dry work surface. Using a clean pipette or dropper, deposit a single drop of distilled water in the center of the slide. The size of the water drop should be slightly larger than your specimen to allow for proper coverage and movement.
Carefully position your specimen within the water drop using forceps or tweezers. Take particular care to ensure the specimen lies flat and remains in a single layer whenever possible. Thick or multi-layered specimens create optical distortion and prevent proper focus across the entire specimen.
Once your specimen rests securely in the water drop, you must add the cover slip without trapping air bubbles beneath it. Position one edge of the cover slip at a 45-degree angle against the slide surface, allowing it to contact the water drop. Gradually lower the cover slip onto the specimen by slowly rotating it downward. This controlled descent permits air to escape and prevents bubble formation. Do not press down forcefully on the cover slip; allow gravity to facilitate gentle contact.
For liquid specimens such as water samples or blood preparations, use a concave slide featuring a shallow depression or well. Deposit three to four drops of your liquid specimen into the well, then add water if dilution is necessary. Cover with a cover slip using the same angled placement technique described above.
Dry Mount Method: Alternative Preparation Strategy
The dry mount technique offers an alternative approach suitable for specimens that do not require liquid suspension. This method proves particularly effective for observing solid, non-delicate materials such as hair, pollen, insect parts, or textile fibers.
To create a dry mount, place your prepared specimen directly onto the center of a clean microscope slide without any liquid medium. Using forceps, carefully position the specimen to ensure it lies flat and remains stable. When you are satisfied with the specimen’s position, hold a clean cover slip at a 45-degree angle and gradually lower it onto the specimen using the same controlled technique employed in wet mounting.
Dry mounts offer several advantages including simpler preparation, longer specimen preservation potential, and the ability to observe specimens without liquid distortion. However, this method works less effectively for delicate, thick, or fragile materials that require support and protection offered by liquid media.
Staining Procedures for Enhanced Specimen Visibility
Many specimens lack sufficient natural color contrast for effective observation under magnification. Staining introduces colored dyes that attach to specific cellular components or structures, dramatically increasing contrast and enabling detailed examination of specimen features.
The staining process begins after you have successfully created a wet mount slide. Using a clean pipette, apply a single drop of your selected staining solution along one edge of the cover slip. The capillary action between the slide, specimen, and cover slip will draw the stain underneath and across the specimen surface.
Allow the stain adequate time to penetrate and react with the specimen material. The required duration varies depending on the stain type and specimen characteristics, typically ranging from several seconds to a few minutes. While waiting, you may observe the stain distribution across the specimen by looking through the microscope eyepiece.
Once the stain has completely covered the specimen, carefully remove excess stain by placing a paper towel or absorbent wipe against the edge of the cover slip. The capillary action will draw the excess stain into the towel. Exercise caution to avoid dislodging the cover slip during this process.
Common staining solutions include iodine, which highlights starch and certain cellular structures with a dark brown or purple coloration; methylene blue, which stains nuclei and other basophilic structures blue; and various specialized stains designed for bacterial, fungal, or parasitic specimens.
Specialized Mounting Techniques for Diverse Specimens
Beyond basic wet and dry mounts, several specialized techniques address particular specimen types and research objectives.
Squash Mounts apply gentle pressure to flatten delicate specimens. Place your specimen on a slide with a small amount of mounting medium, then cover with a cover slip. Gently apply vertical pressure to the cover slip, sometimes using tissue paper to distribute pressure evenly. This technique proves especially valuable for observing thin membranes, plant cells, and insect wings.
Smear Preparations work well for bacterial cultures and tissue samples. Transfer a small sample using a sterile inoculation loop and distribute it evenly across the slide surface, creating a thin, uniform layer. Allow the smear to dry completely before fixing and staining, if desired.
Semi-Permanent Mounting extends slide longevity by applying clear nail polish or specialized mounting media around the cover slip edges. This creates a seal that slows evaporation and prevents cover slip movement while still allowing future slide disassembly if necessary.
Specimen Preparation Considerations
Before mounting any specimen, evaluate whether preliminary preparation improves visibility and observation quality. Thick specimens require trimming or slicing to achieve an optimal thickness that permits light transmission and detailed focus.
For solid materials, use a sharp knife or razor blade to create thin sections. The thinner your slice, the more clearly you will observe internal details under magnification. A thickness of just a few cells or millimeters often provides the best balance between visibility and structural integrity.
Ensure that specimens remain as flat as possible once mounted. Curved, wrinkled, or bunched specimens create focus challenges and prevent uniform magnification across the specimen surface. Gentle pressure during mounting helps achieve optimal flatness.
When working with biological or potentially hazardous materials, exercise appropriate safety precautions. Wear gloves and safety glasses throughout the preparation process, avoid contact with decomposing material, and dispose of specimens according to your institution’s biological waste protocols.
Optimal Observation Practices and Microscope Adjustment
After successfully preparing your slide, proper microscope technique ensures you achieve the best possible views of your specimen. Begin observation at the lowest magnification available on your microscope. This provides a broad overview of specimen distribution and helps locate areas of interest.
Using the coarse adjustment knob, slowly lower the objective lens toward the slide until the image comes into approximate focus. Once basic focus is achieved, employ the fine adjustment mechanism to obtain maximum sharpness and clarity. Only after achieving clear focus at low magnification should you increase to higher magnification levels.
When transitioning to higher magnifications, carefully manipulate the revolving nosepiece to rotate to the desired objective lens. Always monitor the distance between the objective lens and the slide to prevent accidental contact that could damage both the lens and your specimen. Repeat the focusing procedure at each magnification level.
Excessive pressure on the cover slip can distort the specimen and create optical aberrations. Handle prepared slides with care, avoiding unnecessary pressure on the cover slip during observation.
Slide Maintenance and Reusability
Proper care extends the functional life of your slides and cover slips. For temporary slides, after you complete your observations, carefully remove the cover slip and dispose of the specimen according to appropriate protocols. Rinse both the slide and cover slip thoroughly with distilled water and dry them completely.
If cover slips are not permanently sealed, they can be cleaned, sterilized, and reused multiple times. Proper cleaning removes all mounting medium residue and ensures clean glass surfaces for subsequent preparations.
Semi-permanent and permanent slides should be labeled with specimen identification, preparation date, and any relevant notes. Store labeled slides in protective cases in a cool, dry environment to prevent damage and preserve specimen integrity for future reference or archival purposes.
Common Preparation Challenges and Solutions
| Challenge | Cause | Solution |
|---|---|---|
| Air bubbles under cover slip | Rapid or improper cover slip placement | Use angled placement technique and lower cover slip gradually |
| Specimen appears out of focus | Specimen too thick or uneven mounting | Create thinner specimen sections and ensure flat mounting |
| Poor stain distribution | Insufficient capillary action or stain application | Apply stain along cover slip edge and allow adequate time for penetration |
| Contaminated slide or unclear image | Dust, oil, or dirt on glass surfaces | Thoroughly clean and dry all materials before preparation |
| Cover slip movement during observation | Excessive mounting medium or improper placement | Use appropriate mounting medium volume and secure cover slip edges |
Frequently Asked Questions
Q: Can I reuse microscope slides multiple times?
A: Yes, glass microscope slides can be cleaned, dried, and reused many times. However, cover slips that are permanently sealed with mounting medium cannot be reused. Always ensure thorough cleaning and drying between uses to prevent contamination and maintain optical quality.
Q: What is the difference between flat slides and concave slides?
A: Flat slides feature a completely flat surface and work best for most solid specimens and thin materials. Concave slides contain a shallow depression or well on the upper surface, making them ideal for liquid specimens or cultures that require more space and containment.
Q: How do I prevent air bubbles when placing a cover slip?
A: Position one edge of the cover slip at a 45-degree angle touching the mounting medium, then gradually lower it by rotating downward. This angled, gradual approach allows air to escape from beneath the cover slip rather than becoming trapped. Avoid dropping the cover slip straight down, which traps air bubbles.
Q: How thick should my specimen be for optimal observation?
A: Specimens should generally be quite thin, ideally just a few cells thick or a few millimeters in thickness for solid materials. Thinner specimens permit better light transmission and allow you to achieve sharp focus across the entire specimen area. Very thick specimens create optical distortion and focusing difficulties.
Q: Can I make permanent slides at home?
A: Yes, you can create semi-permanent slides by applying clear fingernail polish or specialized mounting medium around the cover slip edges to seal it. This prevents evaporation and cover slip movement while still allowing disassembly if necessary in the future.
Q: What stain should I use for my specific specimen?
A: The appropriate stain depends on your specimen type. Iodine highlights starch and certain cellular structures, methylene blue stains nuclei, and various specialized stains exist for bacteria, fungi, and parasites. Consult reference materials or laboratory protocols specific to your specimen type for recommendations.
References
- Step-by-step guide on microscope slides preparation and further use — Levenhuk Optics. Accessed April 4, 2026. https://levenhuk.com/blog/knowledge-base/microscopes/step-by-step-guide-on-microscope-slides-preparation-and-further-use/
- Microscope Slide Preparation – Guide — Optics Central. Accessed April 4, 2026. https://www.opticscentral.com.au/blog/microscope-slide-preparation-guide/
- How to Make A Microscope Slide – Ideas & Materials — Home Science Tools. Accessed April 4, 2026. https://learning-center.homesciencetools.com/article/microscope-slide-making-ideas/
- How to make microscope slides — Microbehunter Microscopy. Accessed April 4, 2026. https://www.microbehunter.com/how-to-make-microscope-slides/
- How to Mount Microscope Slides — Microscope World. Accessed April 4, 2026. https://www.microscopeworld.com/blog/how-to-mount-microscope-slides/

- Integrated M.A. in Applied Linguistics, University of Hyderabad
- 5+ years in editorial, instructional, SEO, and research-based writing
Sneha is a relationships and lifestyle writer with a strong foundation in applied linguistics and certified training in relationship coaching. She brings over five years of writing experience to theskillvault, crafting thoughtful, research-driven content that empowers readers to build healthier relationships, boost emotional well-being, and embrace holistic living. Her writing and insights reflect the belief that beauty, happiness, and wellness…