
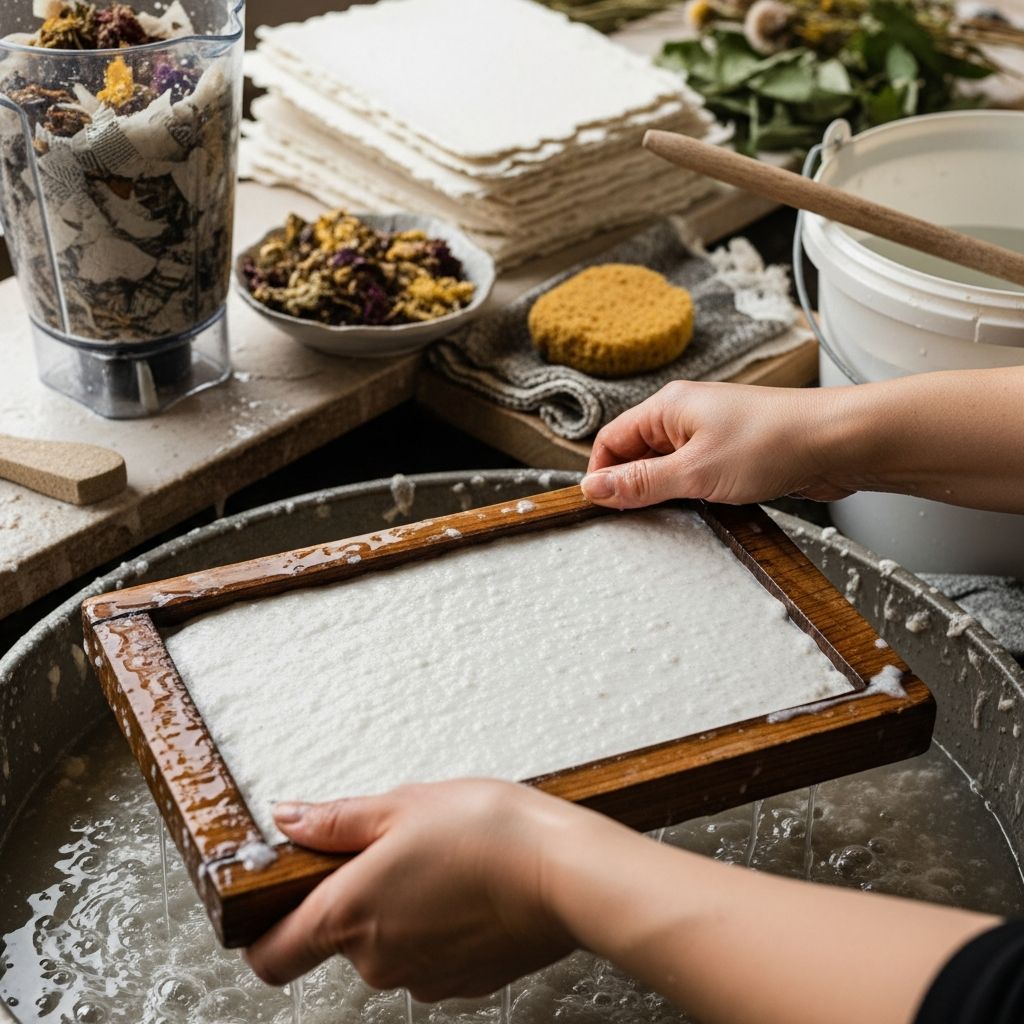
Transforming everyday waste into artisanal sheets opens a world of creative possibilities. Handmade paper offers a tactile, unique texture ideal for cards, journals, and art. This guide details the complete process using recycled materials, emphasizing sustainability and simplicity.
Essential Tools and Materials
Gathering the right supplies is the first step in successful papermaking. Most items are household staples or easily sourced affordably.
- Recycled paper scraps: Junk mail, printer paper, or watercolor sheets (avoid glossy or plastic-coated types).
- Blender or food processor: For creating smooth pulp; dedicate one solely for crafts to avoid contamination.
- Large container or tub: Plastic storage bin or basin to hold water and pulp mixture.
- Mold and deckle: Frames with screen for forming sheets; DIY with picture frames and window screen.
- Absorbent surfaces: Felt sheets, towels, or blankets for initial drying.
- Wood boards or heavy weights: For pressing excess water out.
- Optional additives: Food coloring, dried flowers, or seeds for embellishments.
These materials ensure an accessible entry into papermaking without specialized equipment.
Preparing the Paper Pulp
Pulp forms the foundation of your paper. Proper preparation yields even, strong sheets.
- Collect and shred paper: Gather 1-2 pounds of scraps. Tear or cut into 1-inch pieces to speed breakdown.
- Soak overnight: Submerge pieces in a bucket of warm water. This softens fibers for easier blending.
- Blend into pulp: Fill blender halfway with water, add soaked paper handfuls. Pulse on high for 1 minute per batch until smooth slurry forms. Avoid overfilling to protect the motor.
- Dilute in vat: Pour blended pulp into large tub filled one-third with water. Stir thoroughly; adjust pulp ratio for desired thickness—more pulp means thicker paper.
Experiment with fiber mixes: cotton-rich papers like watercolor stock produce durable results, while newsprint adds texture.
Forming the Paper Sheets
Capturing pulp on the mold creates the sheet shape. Precision here prevents tears.
Assemble mold (screened frame) and deckle (matching plain frame). Stir vat to suspend fibers evenly.
- Hold mold and deckle together at 45-degree angle, screen up.
- Dip to vat bottom, lift slowly while shaking gently side-to-side for uniform distribution.
- Level horizontally; let drain 10-20 seconds until water slows.
- Remove deckle carefully.
For consistent results, maintain vat temperature around room warmth and stir between dips.
Draining, Pressing, and Initial Drying
Removing water quickly prevents warping and sets the sheet.
Place mold face-down on absorbent material like layered towels or felt. Press firmly with hands or rolling pin to squeeze out moisture.
- Couch the sheet: Gently peel mold away, leaving wet sheet on fabric.
- Press stack: Layer multiple sheets between felts, top with board and weights (books work well). Apply even pressure for 10-30 minutes.
This expels up to 90% of water, yielding flatter sheets.
Comparing Pressing Methods
| Method | Tools Needed | Pros | Cons |
|---|---|---|---|
| Hand Pressing | Towels, hands | Simple, no extra tools | Less uniform pressure |
| Weighted Stack | Boards, books | Even drying, stronger sheets | Requires space and weight |
| Rolling Pin | Pin or sponge | Quick moisture removal | May distort thin sheets |
Weighted stacks produce professional-quality results for larger batches.
Drying Techniques for Perfect Sheets
Drying preserves shape and texture. Methods vary by climate and urgency.
- Air drying: Hang sheets on lines or lay flat on screens in sunny, breezy spots. Full dry takes 1-2 days.
- Window or vent drying: Adhere to glass with sunlight or near heat sources for overnight results.
- Exchange drying: Stack with dry blotters, swap daily until crisp (2-3 days).
- Ironing (advanced): Press between parchment under low heat for instant flatness.
Avoid direct heat to prevent brittleness; aim for slow, even evaporation.
Creative Customizations and Add-Ins
Elevate basic sheets with natural elements for artistic flair.
- Coloring: Mix food coloring or natural dyes (beet juice, turmeric) into pulp vat.
- Embeddings: Sprinkle petals, leaves, glitter, or seeds before forming; plantable paper delights recipients.
- Textures: Vary pulp consistency or add string for dimension.
- Sizing: Brush with diluted glue post-drying for ink resistance.
These touches make sheets versatile for invitations, wrapping, or sculpture.
Troubleshooting Common Issues
Beginners often face challenges; here’s how to fix them.
| Problem | Cause | Solution |
|---|---|---|
| Bubbly or uneven sheets | Poor vat stirring | Stir vigorously before each dip |
| Tearing during couching | Too wet or thin pulp | Increase pulp density, press longer |
| Warped drying | Uneven moisture | Use weights, dry flat |
| Brittle paper | Over-drying | Humidity storage post-dry |
Practice with small batches refines technique quickly.
Applications and Project Ideas
Handmade paper shines in diverse uses.
- Stationery: Fold into notecards or envelopes.
- Art: Layer for collages or lamp shades.
- Gifts: Seed paper for plantable tags.
- Bookbinding: Create custom endpapers.
Its eco-appeal reduces landfill waste while fostering creativity.
Frequently Asked Questions (FAQs)
What types of paper work best for pulp?
Cotton rag, watercolor, or untreated printer paper yield strong fibers. Avoid plastic-coated or thermal papers.
How much pulp per sheet?
Start with 1 cup per 8×10-inch mold; adjust for thickness.
Can I make paper without a mold?
Yes, pour pulp on screens over tubs for freestyle sheets, though uniformity suffers.
Is the process messy?
Moderately; use drop cloths and work outdoors if possible.
How long does paper last?
Properly made sheets endure years; store in dry, cool places.
Safety and Sustainability Tips
Papermaking is safe and green. Wear gloves during blending to avoid irritation. Dispose pulp remnants in compost if plant-based. Reuse vat water for gardens post-straining.
Scaling up? Invest in larger molds for efficiency. Communities online share advanced recipes.
References
- Handmade Paper (How to make plantable paper step-by-step) — msshiandmrhe.com. Accessed 2026. https://msshiandmrhe.com/handmade-paper/
- Here’s How to Make Handmade Paper from Recycled Materials — paperslurry.com. 2014-05-19. https://paperslurry.com/blog/2014/05/19/how-to-make-handmade-paper-from-recycled-materials
- How to Make Paper with Kids: A step-by-step tutorial — tinkerlab.com. Accessed 2026. https://tinkerlab.com/how-to-make-paper/
- DIY Handmade Recycled Paper — woodlarkblog.com. Accessed 2026. https://woodlarkblog.com/diy-handmade-recycled-paper/
- Create Your Own Paper! Simple Diy Deckle Tutorial — YouTube (Our Upcycled Life). Accessed 2026. https://www.youtube.com/watch?v=S_WcYeBAezU

- Integrated M.A. in Applied Linguistics, University of Hyderabad
- 5+ years in editorial, instructional, SEO, and research-based writing
Sneha is a relationships and lifestyle writer with a strong foundation in applied linguistics and certified training in relationship coaching. She brings over five years of writing experience to theskillvault, crafting thoughtful, research-driven content that empowers readers to build healthier relationships, boost emotional well-being, and embrace holistic living. Her writing and insights reflect the belief that beauty, happiness, and wellness…