
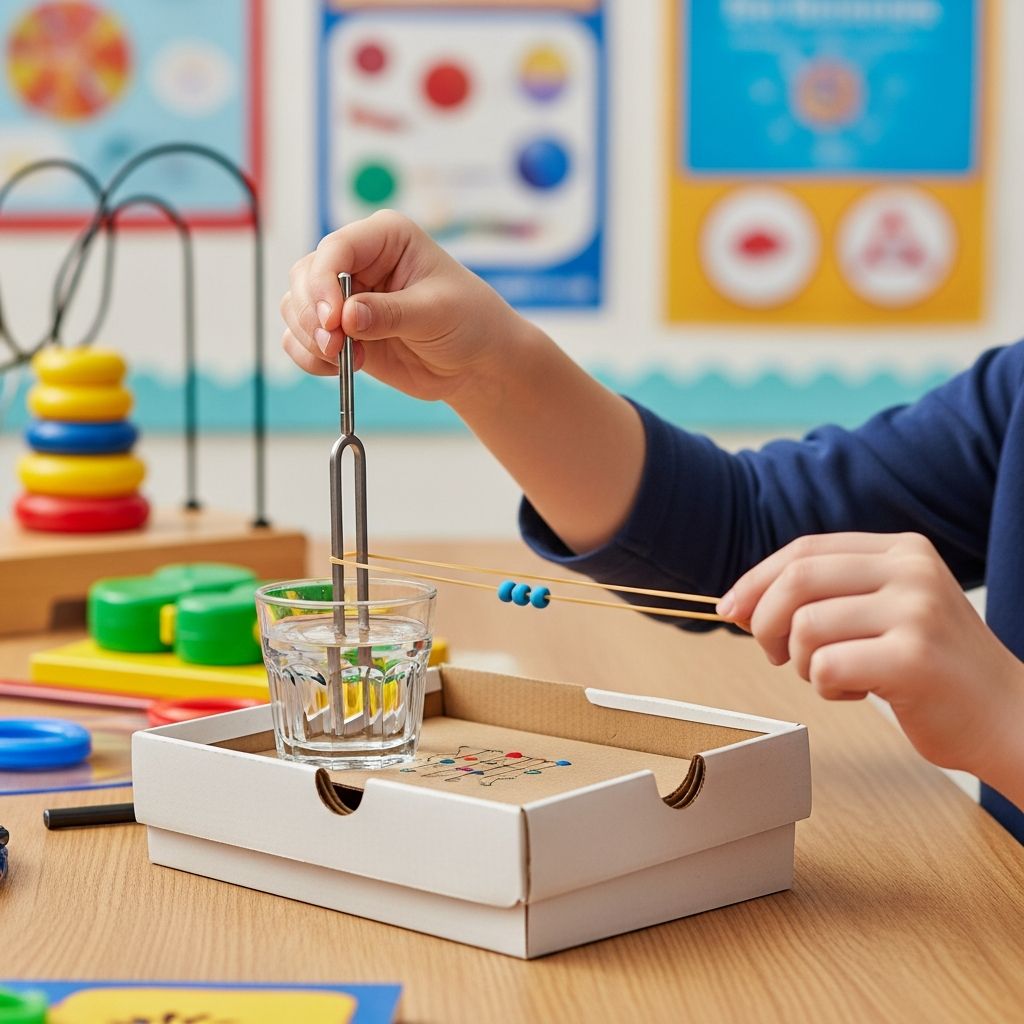
Introduction to Acoustic Learning Through Experimentation
Sound surrounds us constantly—from the rhythm of music to the chirping of birds and the whispers of conversation. Yet most children rarely pause to consider how sound actually works or why different noises have distinct qualities. Sound science provides a fascinating gateway into understanding the physical world through direct observation and interactive play. By engaging in hands-on experiments, young learners develop a concrete understanding of abstract concepts like vibration, frequency, and wave propagation. These activities transform classroom learning from passive listening into active discovery, allowing students to see, hear, and physically feel sound energy in real time.
Understanding the Foundation: How Sound is Created
At its core, sound originates from vibration. When an object moves back and forth rapidly, it disturbs the surrounding medium—whether air, water, or solid material—creating waves that our ears perceive as sound. This fundamental principle underlies all acoustic phenomena and serves as the foundation for numerous classroom demonstrations.
Vibration-Based Activities and Demonstrations
The most effective way to teach sound creation is through activities that make vibrations visible and tangible. When students observe vibrations directly, abstract concepts become concrete experiences. Several proven experiments accomplish this goal:
- Sprinkle Visualization Method – Place small granules (sugar, salt, or rice) on a flexible surface stretched over a container. When sound plays nearby, the granules visibly jump and dance, creating a dynamic visual representation of sound wave energy. This method allows children to literally see vibrations at work.
- Rubber Band Resonance – Stretch rubber bands of varying thicknesses across a container opening. When plucked, thicker bands produce lower tones while thinner bands create higher pitches. Students can observe how tension affects both the vibration speed and the resulting sound quality.
- Balloon Acoustic Demonstration – Inflate balloons and hold them near a speaker playing music. The vibrations transfer to the balloon surface, which students can feel against their hands. This demonstrates how sound energy travels through different media and can be physically sensed.
Exploring Pitch and Frequency Relationships
Pitch—the perceived highness or lowness of a sound—directly correlates with frequency, the number of vibrations occurring per second. High-pitched sounds vibrate rapidly, while low-pitched sounds vibrate slowly. This relationship can be explored through several engaging experiments that allow students to manipulate variables and observe resulting changes.
Frequency-Manipulation Experiments
Student understanding deepens when they can actively control variables and see how changes affect outcomes. The following activities provide this hands-on discovery experience:
- Straw Pipe Exploration – Cut plastic straws to different lengths and blow across the open ends. Shorter straws produce higher frequencies, while longer straws generate lower frequencies. Students can arrange straws in length order and create simple melodies, developing intuitive understanding of the length-frequency relationship.
- Water Column Tuning – Fill clear containers with varying water levels and strike them with a mallet or spoon. Different water heights create different pitches because the column length affects vibration patterns. Students can arrange containers to play simple musical scales.
- String Tension Investigation – Use rubber bands or string stretched across a frame at different tensions. By adjusting tension while plucking, students observe how tightness affects pitch. This principle explains how musical instruments like guitars and violins produce their range of sounds.
Volume and Sound Amplification Concepts
Volume, measured in decibels, represents the intensity or loudness of sound. Unlike pitch, which depends on frequency, volume relates to the energy contained in vibrations. Louder sounds carry more vibrational energy, while softer sounds have less energy. Several experiments help students grasp this distinction and explore amplification principles.
Amplification and Resonance Activities
Amplification occurs when sound waves interact with surfaces that naturally vibrate at matching frequencies, strengthening the original sound. Students can explore these principles through practical experiments:
- Acoustic Device Construction – Roll paper into cone shapes and use them as megaphones or ear trumpets. When positioned near sound sources, these simple devices channel and concentrate sound waves, demonstrating how shape influences acoustic properties.
- Resonance Chamber Exploration – Place tuning forks or vibrating objects against various containers. Different materials and shapes resonate differently, either amplifying or dampening the original sound. This illustrates why musical instruments have specific shapes.
- String-Based Sound Transmission – Create simple devices using strings or yarn to transmit vibrations over distance. By keeping tension consistent while varying string length or material, students observe how these factors affect sound transmission quality.
Sound Propagation Through Different Materials
Sound travels differently depending on the medium it passes through. It moves fastest through solids, more slowly through liquids, and slowest through gases. This characteristic explains why submarine detection systems use sound waves underwater and why sound seems muffled in air when coming from distant sources. Experiments exploring these properties provide valuable insights into acoustic physics.
Medium-Specific Sound Transmission Experiments
By systematically testing sound propagation through various materials, students develop understanding of how molecular density affects acoustic behavior:
- String Telephone Systems – Connect two cups with taut string or yarn. When one person speaks into a cup while another listens at the opposite end, sound travels through the solid string rather than through air. The tighter the string, the better sound transmission occurs. This demonstrates how solids conduct sound efficiently.
- Vibration Transmission Through Solids – Hold a tuning fork against different solid objects—wood, metal, plastic, glass. Observe how each material transmits vibrations differently. Some materials amplify vibrations while others dampen them.
- Underwater Sound Propagation – Place a speaker in a water-filled container and tap the outside surface. Sound travels efficiently through water, and students can hear vibrations clearly. Comparing sound quality through water versus air highlights how liquid density affects transmission.
Interactive Instrument Creation as Applied Learning
Perhaps the most engaging sound science activities involve students creating their own musical instruments using recycled or household materials. This approach transforms abstract acoustic principles into tangible, playable objects. Students invest emotionally in instruments they’ve constructed and become motivated to understand the science behind their creations’ performance.
Instrument Building Frameworks
Creating instruments reinforces multiple sound concepts simultaneously:
- Percussion Instrument Assembly – Students design and construct drums, shakers, and mallets. By experimenting with different striking techniques, surface materials, and internal contents, they discover how these variables affect sound quality and volume.
- Wind Instrument Development – Using PVC pipes, straws, and cardboard tubes, students create flutes and whistles of varying designs. They learn how pipe length determines pitch and how hole placement affects the notes produced.
- String Instrument Fabrication – Rubber bands stretched across containers or frames become functional string instruments. Students adjust tension, string thickness, and resonance chamber size while observing acoustic changes.
Advanced Exploration and Extended Learning Activities
Beyond basic experiments, teachers can develop deeper engagement through enrichment activities that encourage students to apply sound science principles to novel situations and questions.
Extension and Challenge Activities
- Establish a sound science demonstration gallery where student groups present and explain their experiments to classmates and families
- Use sound measurement applications to quantify volume changes during experiments, introducing data collection and analysis
- Research animal communication methods and how different species produce and perceive sound
- Design soundproofing solutions using various materials, testing effectiveness with consistent measurements
- Create musical compositions using student-built instruments, combining art with acoustic science
- Investigate how concert venues and recording studios optimize sound quality through architectural design
Integration with Educational Standards and Objectives
Sound science experiments align with widely recognized educational standards. Activities demonstrating vibration and sound propagation address core physics concepts while developing scientific thinking skills. Students learn to form hypotheses, conduct controlled tests, collect observations, and draw evidence-based conclusions—fundamental scientific practices applicable across all disciplines.
Frequently Asked Questions
Q: What age groups are appropriate for sound science experiments?
A: Sound experiments can be adapted for various age groups. Elementary students explore basic vibration and sound creation concepts, middle schoolers investigate frequency and wavelength relationships, and high schoolers examine acoustic physics at greater depth. Most activities scale effectively across grade levels with appropriate modifications.
Q: What materials do I need for these experiments?
A: Most experiments require only common household items: string, cups, rubber bands, containers, spoons, straws, and various striking implements. The beauty of sound science is that sophisticated concepts can be explored without expensive equipment or specialized materials.
Q: How can I ensure safety during sound experiments?
A: Sound experiments are generally safe when basic precautions are observed. Avoid exposing students to dangerously loud sounds from speakers or devices. Supervise activities involving small objects that might become projectiles. Ensure strings and materials are secure and won’t cause tripping hazards.
Q: How long do typical sound experiments take?
A: Most activities can be completed in 20-45 minutes, making them suitable for single class periods. Some extension activities or instrument-building projects may require multiple sessions for full development and exploration.
Q: Can these experiments be done remotely or at home?
A: Absolutely. Sound experiments are ideal for remote learning environments since they require minimal materials and can be performed in homes. Students can document activities through photos or videos and share findings with classmates or teachers.
References
- Sound and Vibrations Experiments for Kids — Little Bins for Little Hands. Accessed April 4, 2026. https://littlebinsforlittlehands.com/sound-science/
- 5 Sound Wave Experiments for Kids — Teach Beside Me. Accessed April 4, 2026. https://teachbesideme.com/5-sound-wave-experiments-for-kids/
- Sound Experiments for 1st Graders — Andrea Knight Teacher Author. Accessed April 4, 2026. https://andreaknightteacherauthor.com/sound-experiments-for-1st-graders/
- Feeling Sound: Science Experiments for Kids — 3M Company. Accessed April 4, 2026. https://www.3m.com/3M/en_US/science-at-home-us/science-experiments-for-kids/sound-wave-science-experiment-for-kids/
- Light and Sound Science Experiments — Science Fun. Accessed April 4, 2026. https://www.sciencefun.org/kidszone/experiments/light-and-sound-science-experiments/

- Integrated M.A. in Applied Linguistics, University of Hyderabad
- 5+ years in editorial, instructional, SEO, and research-based writing
Sneha is a relationships and lifestyle writer with a strong foundation in applied linguistics and certified training in relationship coaching. She brings over five years of writing experience to theskillvault, crafting thoughtful, research-driven content that empowers readers to build healthier relationships, boost emotional well-being, and embrace holistic living. Her writing and insights reflect the belief that beauty, happiness, and wellness…